Have you ever been interested in making your own catnip toy but just didn’t know where to start? Have you been interested in crafting but want to minimize the cost? Well here’s a helpful guide to a basic catnip kicker toy that you can use as a baseline to explore some more creative designs, or you can just stick with the good ole’ originals!


The first step is gathering up your supplies, which we have some options for.

I used polyester fiber filler for the inside of my toy, but cotton is an acceptable trade out. You can also experiment with using shredded brown paper (the kind you get in shipping containers) for the stuffing purpose. Find some pretty fabric swatches (like this set I found for less than $5), or recycle an old T-shirt, pillow case, or any fabric you can think of that you want to rehome (just watch out for anything that may hang down and be a chewing/choking hazard). Gather some cutting scissors (fabric scissors preferred but not necessary), a needle, and some thread. Finally, you’ll want to add some surprises in your new toy. Catnip is the original flavor (and luckily, I had some spare bags stocked up from purchasing other toys, or you can grow and dry your own!), but you can also try small bells, some crinkle/noise paper, pipe cleaners, feathers, etc.—get creative!
 Start by cutting your fabric into two rectangles about 5”x12”, or customize the size and shape of your new toy.
 Line the pieces back to back with the design facing inward. Thread your needle, and create a knot on the opposite end.
 Starting in the top corner, hand stitch the pieces together starting down the long side, coming around the bottom, and back up. Remember to keep the top open for now!
Finish up by tying off the rest of the thread with small stitches, then looping the needle through prior to securing. Repeat several times for a good seal.

 Once you have three of the four edges sewn together, then it’s time to flip the toy inside out. Gently fold and roll back from the open section until the design is fully reversed. Don’t worry if you sewed too close to the edges in some areas; we can go back and repair as needed.


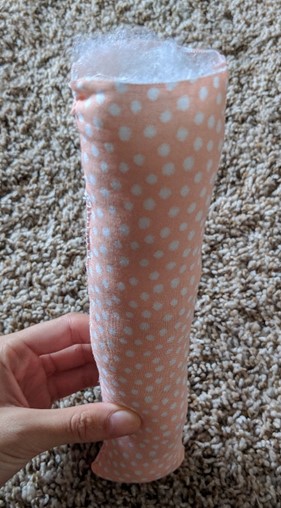
 Once the design of the fabric is on the outside, we will want to begin stuffing it. Here I used a combination of polyester fill and catnip, alternating between the two until almost full.

 Once I got to the top of my toy, I noticed a busted seam on one of the sides. It is recommended to repair any busts prior to fully closing in order to allow the most materials in the toy and to keep it looking full.
For repairing the bust, I typically start with my knot on the thread on the inside of the toy, then loop up and over tightly until the hole is fully covered. Periodically throughout the looping, be sure to fold in the fabric edges to make a nice, smooth seam. Again, you can tie off the thread the same way you did previously.

Once any holes or bust are fixed, it’s time to close the toy. Fold the top edges in (pin if desired), add any last-minute stuffing or toys, and begin closing similarly to how we closed the bust.


The first step is gathering up your supplies, which we have some options for.
Gather the Supplies!

• Sewing needles
• Thread
• Scissors (fabric scissors preferred)
• Fabric pieces
• Polyester fiber filler (or other filler)
• Catnip (or bells, crinkly items, etc.)
 Start by cutting your fabric into two rectangles about 5”x12”, or customize the size and shape of your new toy.
  Line the pieces back to back with the design facing inward. Thread your needle, and create a knot on the opposite end.
  Starting in the top corner, hand stitch the pieces together starting down the long side, coming around the bottom, and back up. Remember to keep the top open for now!
 Finish up by tying off the rest of the thread with small stitches, then looping the needle through prior to securing. Repeat several times for a good seal.


 Once the design of the fabric is on the outside, we will want to begin stuffing it. Here I used a combination of polyester fill and catnip, alternating between the two until almost full.
 Once I got to the top of my toy, I noticed a busted seam on one of the sides. It is recommended to repair any busts prior to fully closing in order to allow the most materials in the toy and to keep it looking full.
 For repairing the bust, I typically start with my knot on the thread on the inside of the toy, then loop up and over tightly until the hole is fully covered. Periodically throughout the looping, be sure to fold in the fabric edges to make a nice, smooth seam. Again, you can tie off the thread the same way you did previously.

Once any holes or bust are fixed, it’s time to close the toy. Fold the top edges in (pin if desired), add any last-minute stuffing or toys, and begin closing similarly to how we closed the bust.


Start on the inside of the fabric and loop the thread up and over, pinning the two sides together as you come through. Secure once more with multiple knots, then let your kitties play!


Comments
Post a Comment